

How To Draw Lilacs With Colored Pencils
In this tutorial, I'll evidence you lot the procedure of creating a nature-inspired artwork that depicts a peony and cherry blossoms, pop symbols of spring and flourishing.
To depict this beautiful floral composition, we will use colored pencils. They are a powerful artistic tool, and the dandy news is that pencils are very simple to utilise.
What You Volition Demand
- Two sheets of paper
- A graphite pencil (I recommend an HB type)
- A sharpener
And pencils of different colors:
- Chocolate brownish
- Medium grey
- Raspberry red
- Rosy
- Lilac
- Rich blueish
- Emerald green
- Calorie-free dark-green
- Yellow
- Creamy (or calorie-free beige)
- White
My colored pencils are aquarelle, but this characteristic doesn't really matter. We'll piece of work without washing the strokes.


1. How to Brand a Pencil Sketch of the Flowers
Footstep 1
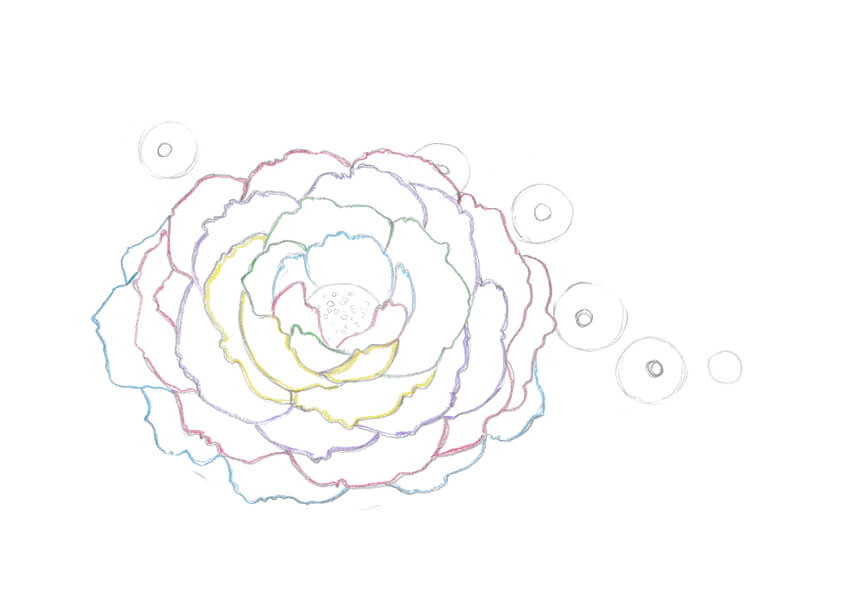
I outline the composition in a full general way. With a pencil, I sketch an oval shape for the peony and smaller round shapes for the red flowers.


Step 2
I outline the cadre of the peony and fill it with small circles to mark the texture.


Step 3
I draw the first central petals of the peony. I too outline them with a blue pencil; I volition be applying a new color to each new group of petals and then yous can easily differentiate them.
The choice of adding any colors to your sketch is entirely up to you.


Step 4
I draw a couple of new petals in front of the existing ones and outline them with a ruddy pencil.


Step five
I draw an overlapping petal and a grouping of several rear petals. I mark them with the greenish color.


Step 6
I add together several foreground petals and outline them with yellow.


Step vii
I imagine that the petals arrange themselves effectually the cadre of the flower, and add together another layer. And so I mark the new group with a lilac pencil.


Step viii
I more than layer of petals, and this time I outline them with cerise.


Step ix
The peony is near consummate. I add together several more petals that hide underneath and outline them with a blue pencil.


Stride 10
It's time to marking the central parts of the cherry blossoms. I draw small circles with a pencil.
It is not necessary to put these circles exactly into the geometrical centers of the flowers. The blossoms are facing in slightly different directions; moreover, they are organic objects that tin can't look equal.


Footstep 11
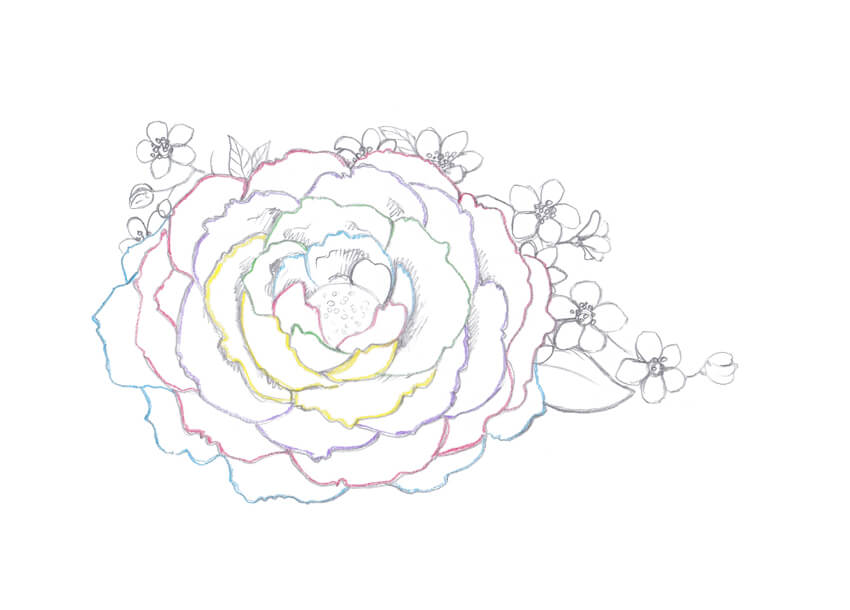
Each cherry bloom has five petals, and I add them with pencil lines. It is also a great trick to diversify our floral limerick with a small ruby-red bud.


Stride 12
I add together new details, such as a twig line, a couple of leaves, and new flowers.


Step 13
I draw a peony leaf in the foreground. I likewise add together stamens of the red blossoms; they wait like minor circles.
Our pencil sketch is consummate. You can get out it every bit information technology is now or marker shady areas, as I did for the central part of the peony, separating the petals with shadows.


2. How to Apply Pencil Strokes
Step 1
Colored pencils can help you lot achieve astonishing results. There are several principles to recollect, and one of them is the importance of creating layers of colour. An overlap of tints and shades creates a much more than interesting, impressive issue than only 1 colour.
The showtime way yous can apply your tool is by making lines with soft rubbing strokes, holding your pencil at an angle. The lines can be directional...


… or rounded. This kind of stroke is perfect for shine textures and a base color layer.


Step 2
Some other excellent method is hatching. It is very similar to drawing with an ordinary pencil or pen; the signal of your colored pencil should be precipitous.
Hatching works best for calculation details and drawing refined objects or textures.


three. How to Draw Flowers With Colored Pencils
Step 1
I make a clean copy of my pencil sketch, transferring only full general contours with very lite lines.
For this step, I recommend using a greyness pencil from your colored pencils prepare, and not a graphite pencil. Lines made with a graphite pencil can mix with the colour and make it seem dirty.
The lines that you encounter in the image below are barely visible in existent life. I intensified them while editing the scan and then y'all could see them distinctly.


Stride 2
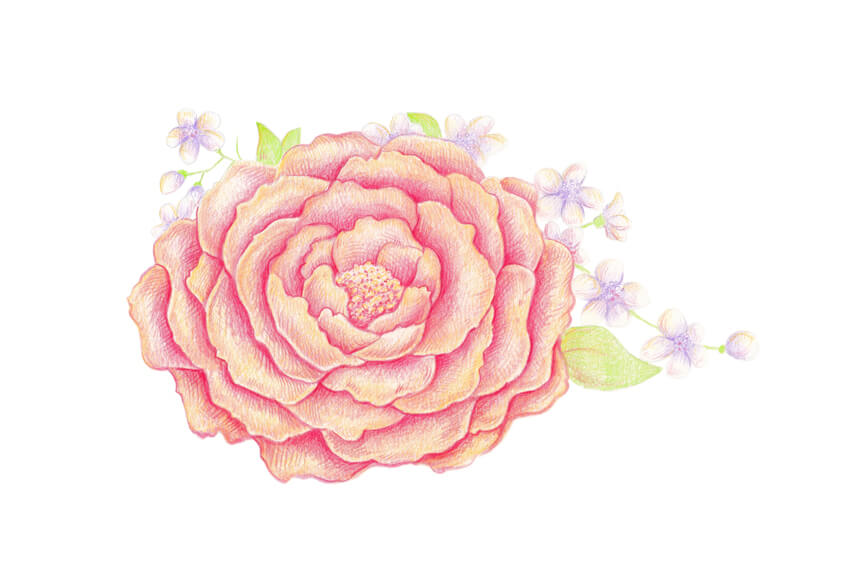
I employ a pencil of the creamy color to cover the peony shape with soft rubbing strokes.


Step iii
With the lilac pencil, I add color to the central parts of the cherry flowers. I depict the hatches from the core to the petals.


Step 4
I apply the light greenish colour to the leaves and the twig.


Step 5
I create an boosted layer of theyellow color on the peony, accenting the upper parts of the petals.


Step 6
I add the rosy color, aiming at the nighttime places of the flower. It helps me in separating the petals ane from some other.
The point is about applying a trunk of color, not just a single line.


Step 7
I keep increasing the dissimilarity with the rosy color.
The bending parts of the petals are spotlit, then I avoid making them too brilliant.


Pace viii
I complete the process of applying strokes with the rosy pencil.
To create a unified look for the artwork, I also add several hatches to the cherry flowers.


Stride 9
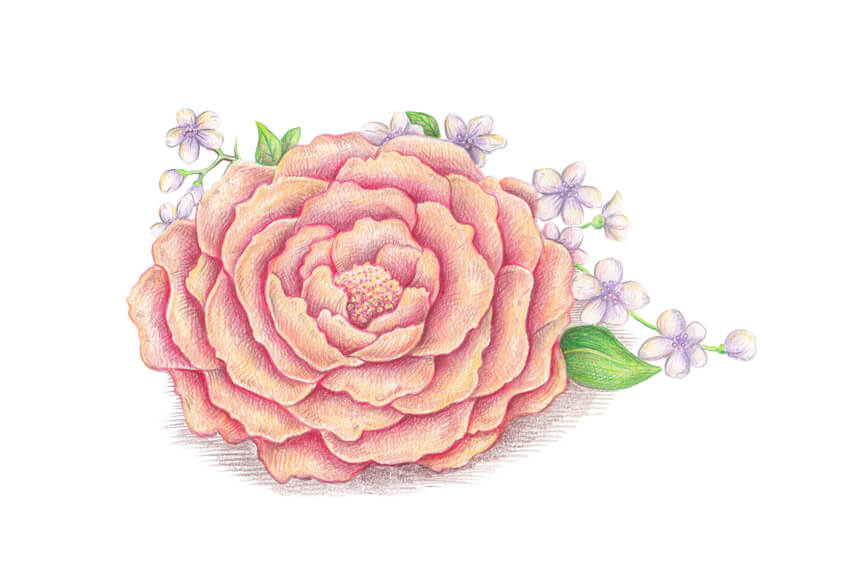
Information technology is fourth dimension to increase the contrast even more. I add the raspberry red color to the peony, accentuating the shadows between the petals.


Step 10
I apply hatches with the emerald green pencil to add details.


Stride eleven
I employ the grey pencil to mark the contours of the cerise flowers. Information technology'south important non to overdo the drawing; the cherry blossoms should stay light.


Step 12
It is time for blending with the white pencil. I utilise it on top of the grayness strokes and shade them. The result is a smoother color transition.
This method is too known as burnishing, and I highly recommend using it in your drawings.


Step xiii
I make my artwork feel more natural by adding thin hatches fabricated with the brown pencil to the shadows. I also create a drop shadow under the peony.


Step 14
I apply an additional layer of thecreamy color to the peony. It looks more warm-colored now.


Footstep xv
I add some xanthous strokes to the core of the peony and to the drib shadow.


Step xvi
To make my artwork more than interesting, I vary the range of colors with an inclusion of blue strokes.
I add together thin hatches to the petals of the flowers and to the drop shadow.


Pace 17
With the medium grey, I intensify the drop shadow.
It is too corking to add together thin hatches to the petals to rest this bright artwork.


Step 18
I evaluate my drawing. It looks nice enough, but I feel that adding several strokes of thebluish color to the upper parts of the peony's petals is a great concluding touch.


Your Artwork Is Consummate
Congratulations, we've created a beautiful spring artwork! I hope you became inspired by the flowers and enjoyed the process of drawing with colored pencils.
I wish you much success with this wonderful technique and your creative projects!

Source: https://design.tutsplus.com/tutorials/how-to-draw-spring-flowers-with-colored-pencils--cms-28159
Posted by: baileylierearmeng.blogspot.com
0 Response to "How To Draw Lilacs With Colored Pencils"
Post a Comment