Jira How To Create A Dashboard
Here's a guide on how to create Jira dashboards and how to customize it according to your needs.
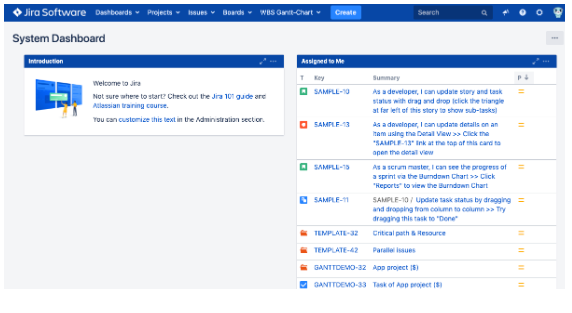
Once you have opened Jira Software, there will be a screen that may already contain some information about your project, and that is the Jira dashboard. Actually, it's the homepage which by default contains something to simplify your job keeping all the important things in one place. So, when you start using Jira Software, your dashboard may look like this:

Jira Dashboard
You can use the Jira dashboard created by default, or create a completely new one, and the creation process is pretty simple. You should remember that it may seriously influence your work, so first, you need to do is to think thoroughly of what exact information you want to track, like the tasks and subtasks of the project, some statistics, filters, and what are your goals.
Your goals will help you to make a decision about the Jira dashboard gadgets. Chosen the best gadgets for your new dashboard you'd be able to get the progress as quickly as possible.
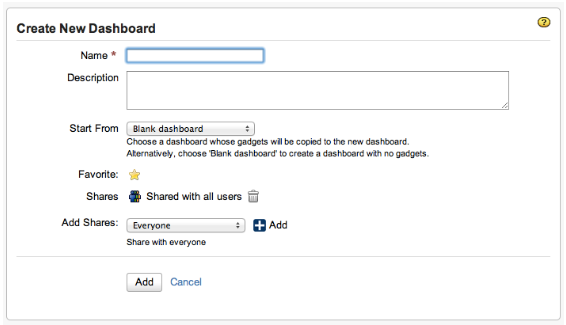
So, after you made up your mind with the goals and gadgets you want and everything are determined, you only left to do some technical steps. But first, make sure that you have permission to do that, so ask your admin about it. If everything is alright with permissions, you'll find on your screen the top left and select Dashboards, then click on "Manage Dashboards". In the top-right menu click on the "Create Dashboard".

New Jira Dashboard creation
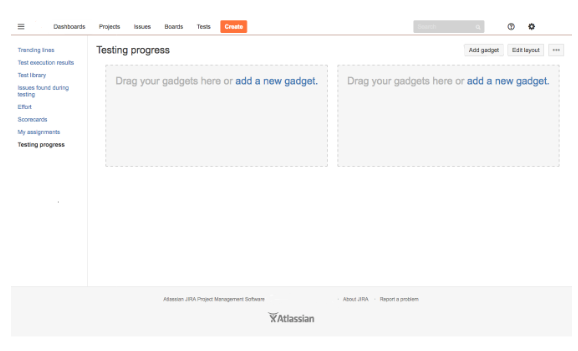
As you can see, you need to name your dashboard and fill in the description to it, if you want. You can share the dashboard with the other team members, it's sharable by the Group, by the Project, by any logged-in user or you can even make it public so everyone could see the details of your work. The blank dashboard means there will be nothing on it, so you'll be able to custom it and add what you wish. After everything is set up, just push the "Add" button, and you'll get a very blank Jira dashboard, which will look like this:

Blank Jira Dashboard
You can also edit the Layout, choosing something from the built-in templates. If you're not sure about it now, you can edit it whenever you want.
Now it's time to add some gadgets to it. Click on the link "add a new gadget" or the relevant button on the top right of your screen. You'll see a full list of standard solutions out of the box, so you are free to choose what you want and change it with time, looking for what is best for you. (https://confluence.atlassian.com/display/GADGETS/All+Atlassian+Gadgets).
And if you can not find anything relevant for your project, you can always find something in the Atlassian Marketplace. But don't go crazy with it, or you could overcharge your dashboard with gadgets, it's enough to have 5-6 ones.
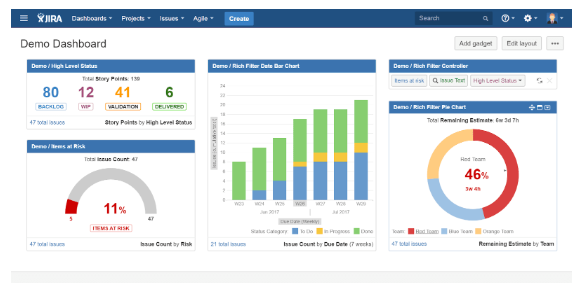
After you added some gadgets, you need to do all the settings and save them. Don't worry, you can edit them at any time. You can also change the panel colors, styling it on your own preference.

Demo Dashboard
You can also have multiple dashboards, there is no limitation of how many you should have. But be careful with it, as you may just waste your time managing too many dashboards that you actually need.
With this guide, your Jira Dashboard should operate as an overview of your actual projects and information important for you. If you want everything to be done perfectly, feel free to contact us, and our Atlassian experts will configure your Jira according to your needs.
Jira How To Create A Dashboard
Source: https://polontech.com/blog/how-to-create-dashboard-in-jira/
Posted by: baileylierearmeng.blogspot.com

0 Response to "Jira How To Create A Dashboard"
Post a Comment